Easy Origami Carnation: Step-by-Step Flower Craft
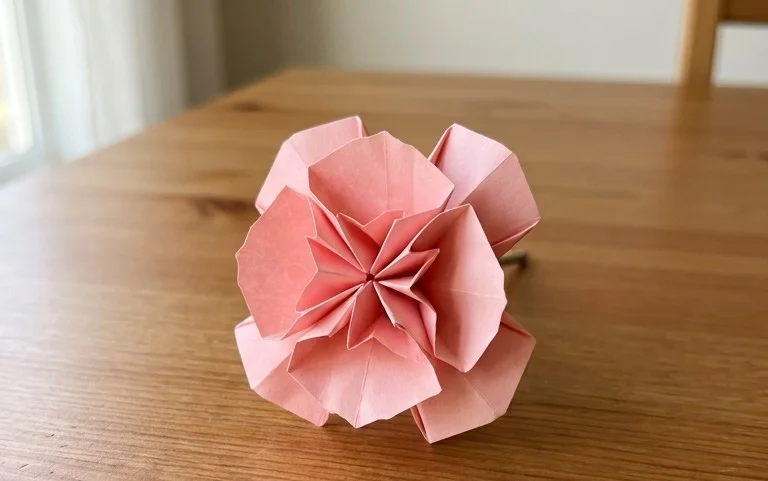
Origami Carnations are such a beautiful and rewarding paper flower to fold, aren’t they? Imagine creating delicate, layered blossoms with ruffled petals that look remarkably like the real thing, perfect for adding a touch of handmade charm to any occasion. This tutorial is designed for everyone, from complete beginners dipping their toes into the world of paper folding to kids looking for a fun and engaging craft. You’ll be able to whip up a gorgeous carnation in about 15-20 minutes, making them ideal for last-minute gifts or charming decorations. Throughout these steps, I’ll guide you through each fold with clear instructions, teaching you how to transform a simple square of paper into a stunning, three-dimensional bloom. Let’s get our hands busy and fold some floral magic together!
Origami Carnation: Step-by-Step Instructions
Hello, budding origami artists! Today, we’re going to create a beautiful and surprisingly simple origami carnation. These flowers are fantastic because they don’t require any glue or cutting, and they look so charming in a bouquet. I’ll guide you through each step with clear instructions, so even if you’re new to origami, you’ll be able to create these lovely blooms. Let’s get started!
Choosing Your Paper
The type of paper you choose can make a big difference in the final look and feel of your carnation. For this project, I recommend a standard origami paper.
* **Type:** Origami paper is ideal because it’s thin, strong, and holds creases well. Regular printer paper can be a bit too thick, making it harder to fold precisely, and it might not fold as cleanly.
* **Weight:** Standard origami paper is usually around 60-80 gsm (grams per square meter). This weight provides a good balance of durability and foldability.
* **Size:** For a classic carnation size, a 6-inch (15 cm) square is perfect. If you want a larger flower, you can use 8-inch (20 cm) squares. Smaller squares will result in miniature carnations, which are also adorable!
* **Single or Double Sided:** For the carnation, I actually prefer single-sided origami paper. This means one side is colored (or patterned), and the other side is white. As we fold, the white side will show through in some areas, giving the petals a lovely, subtle gradient effect that mimics real carnations. However, double-sided paper will also work beautifully if that’s what you have. The key is to ensure your paper is square.
Understanding the Base Folds
Before we dive into the carnation itself, let’s get familiar with a couple of fundamental origami folds that are crucial for this model.
* **Valley Fold:** This is the most common fold. You bring one edge or corner to meet another edge or corner, and crease along the line where they meet. The crease will look like a ‘valley’.
* **Mountain Fold:** This is the opposite of a valley fold. You fold the paper away from you, creating a crease that looks like a mountain peak. We’ll use a combination of these.
Making clean folds is paramount in origami. Here’s how to ensure yours are sharp and precise:
* **Alignment is Key:** Take your time to perfectly align the edges and corners before creasing. Even a tiny misalignment can affect subsequent steps.
* **Use Your Fingernail:** After bringing the edges together, run your fingernail firmly along the fold line. This creates a sharp crease that will hold its shape.
* **Work on a Flat Surface:** Always fold on a hard, flat surface like a table or desk. This provides stability and helps you make accurate creases.
Now, let’s begin constructing our carnation!
The Fold Sequence: Step-by-Step
We’ll start with a single square of origami paper. If you’re using single-sided paper, begin with the colored side facing down and the white side facing up.
1. **Diagonal Fold:** Take the bottom left corner of your square and bring it up to meet the top right corner. Align the corners precisely. Crease the fold firmly from one edge to the other. You should now have a triangle with the long edge at the bottom.
2. **Second Diagonal Fold:** Now, take the bottom right corner of this triangle and bring it up to meet the top left corner. Again, align the corners perfectly and crease firmly. You should now have a smaller triangle.
3. **Open Up:** Unfold the last two folds. You will see two diagonal creases forming an ‘X’ on your paper.
4. **Horizontal Fold:** Flip the paper over so the colored side is facing up. Take the bottom edge and bring it up to meet the top edge. Align the edges perfectly and crease firmly. You now have a rectangle.
5. **Vertical Fold:** Fold the rectangle in half by bringing the right edge over to meet the left edge. Align the edges and crease firmly. You now have a smaller square.
6. **Petal Fold Preparation:** Unfold the last two folds (the horizontal and vertical folds). You should now see four creases on your paper: two diagonals forming an ‘X’, and a horizontal and vertical line forming a ‘+’.
7. **Squash Fold:** This is a key step! Hold the paper so the colored side is facing up. Gently push in the left and right sides of the paper towards the center, along the vertical crease. As you do this, the top section of the paper should naturally come down. You’re aiming to create a smaller square where all the corners are together at the bottom. This is called a “squash fold” or “waterbomb base”. Ensure the raw edges are neatly aligned at the bottom point. Crease all the new edges firmly. You should now have a smaller square with four flaps.
8. **Preliminary Base:** Flip the paper over and repeat the squash fold on the other side. You’ll end up with a shape that looks like a kite or a diamond, with two flaps on each side meeting at the top point. This is often called a preliminary base.
9. **Kite Fold (Side 1):** Take the top layer of the right flap. Fold its outer edge inwards so it aligns with the vertical center crease. Crease firmly.
10. **Kite Fold (Side 2):** Repeat step 9 with the top layer of the left flap. Fold its outer edge inwards to align with the vertical center crease. Crease firmly. You should now have a kite shape on the top layer.
11. **Flip and Repeat:** Flip the entire model over. Repeat steps 9 and 10 on this side. Fold the outer edges of both flaps inwards to meet the center crease. Crease firmly. You should now have a symmetrical kite shape on both sides.
12. **Petal Fold (Side 1):** Look at the top point of your kite shape. You’ll see two little triangular flaps pointing upwards. Take the top layer’s right flap and fold it upwards, so its bottom edge aligns with the top point of the kite. Crease firmly.
13. **Petal Fold (Side 2):** Repeat step 12 with the top layer’s left flap. Fold it upwards so its bottom edge aligns with the top point of the kite. Crease firmly. You should now have a shape that looks like a diamond with two pointed flaps at the top.
14. **Flip and Repeat:** Flip the entire model over. Repeat steps 12 and 13 on this side. Fold both top flaps upwards to align with the top point. Crease firmly. You should now have a symmetrical shape with four flaps pointing upwards.
15. **The Carnation “Bud”:** Now, carefully separate the layers at the top. You’ll see a small pocket. Gently pull the layers apart, and the flower shape will start to emerge.
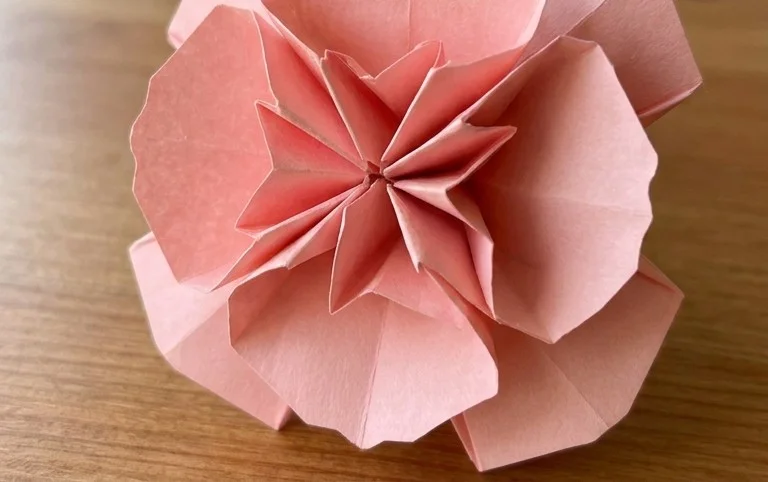
16. **Shaping the Petals:** This is where the magic happens! Gently pull outwards on the four points at the top of your model. As you pull, the paper will naturally open up and start to resemble the ruffled petals of a carnation. You can pull them as far as you like to achieve the desired fullness.
17. **Final Touches:** You can gently curl the edges of the petals outwards with your finger or a pencil to add more realism and softness.
Common Beginner Mistakes and How to Avoid Them
Even with clear instructions, it’s easy to run into a few snags when you’re starting out. Don’t worry; these are common, and once you know what to look for, you’ll master them!
* **Misaligned Folds:** This is probably the most frequent issue. If your corners aren’t perfectly matched or your edges aren’t flush before you crease, the entire model can become distorted, and later steps won’t line up correctly.
* **How to Avoid:** Be patient! Double-check your alignment before making any crease. If you’re unsure, gently adjust the paper until it’s perfect. It’s better to take an extra few seconds here than to have to undo multiple folds later.
* **Soft Creases:** If your creases aren’t sharp enough, the paper won’t hold its shape, and your carnation might look floppy or uneven.
* **How to Avoid:** After bringing the edges or corners together, use your fingernail to firmly run along the entire length of the fold. You can even use the edge of a ruler or a bone folder if you have one. The crisper your creases, the more defined your final flower will be.
* **Difficulty with the Squash Fold (Step 7):** This is often the first place beginners get a bit confused. Pushing the sides in while the top comes down can feel a bit counter-intuitive.
* **How to Avoid:** Don’t force it! Gently guide the paper. Think of it as collapsing the paper inwards. If you have creases from previous steps, they will help guide where the paper should fold. Try making the creases from the previous steps (steps 1-6) very precise; this will help the squash fold collapse more easily. Sometimes it helps to gently lift the paper a little at the sides as you push inwards.
Varying Your Origami Carnations
The beauty of origami is its versatility! You can easily customize your carnations to suit any occasion or style.
* **Size:** As mentioned earlier, use larger squares for bigger flowers and smaller squares for miniature ones. You can create a tiered bouquet with a mix of sizes!
* **Paper Pattern:** Don’t limit yourself to solid colors. Origami paper comes in a vast array of beautiful patterns – floral, geometric, textured, even metallic. A patterned paper can add a unique charm to your carnation. For a very realistic look, try papers with subtle color variations or textures that mimic real flower petals.
* **Color:** The possibilities are endless! Red, pink, and white are classic carnation colors, but don’t be afraid to experiment with orange, yellow, purple, or even variegated papers that have multiple colors blended together.
Displaying and Gifting Your Carnations
Once you’ve made a beautiful bunch of origami carnations, you’ll want to show them off!
* **Bouquets:** Arrange them in a vase, just like real flowers. You can combine them with other origami flowers or even some real greenery.
* **Table Centerpieces:** Cluster several carnations together for a striking centerpiece for a dinner party or special event.
* **Gift Toppers:** Attach a single, elegant carnation to a gift box or a card for a personal and handmade touch.
* **Party Favors:** Make a small carnation for each guest at a birthday party or wedding shower. They make lovely and memorable favors.
* **Decorations:** String them together to create a beautiful garland for a room or a festive banner.
* **Lapel Pins:** You can even add a small pin to the back of a sturdier carnation to create a unique and eye-catching accessory.
Creating origami carnations is a rewarding and enjoyable process. With a little practice and attention to detail, you’ll be folding these beautiful blooms like a pro in no time. Enjoy the process, and have fun with your floral creations!
Conclusion
Congratulations on completing your origami carnation! Don’t worry if your first attempt isn’t perfect; every fold is a step in learning this beautiful craft. The most important thing is to enjoy the process of creating something lovely with your own hands. We encourage you to share your stunning paper carnation with friends and family, spreading the joy of origami!
Ready for more? Try creating a miniature carnation by using smaller paper, or explore a layered petal variation for added depth. We hope this tutorial has sparked your creativity. Come back soon and explore more delightful paper projects!