Easy Paper Wisteria Flowers: DIY Hanging Craft
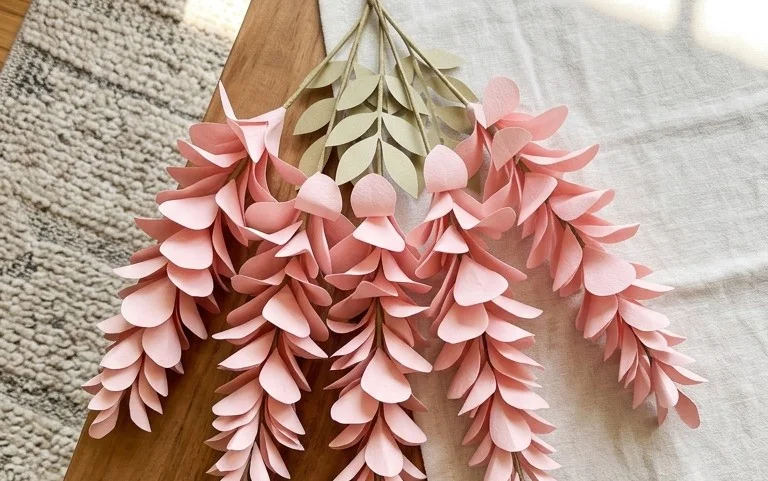
Paper Wisteria is about to bloom right in your home with this delightful DIY hanging flower tutorial! Imagine delicate, cascading strands of tiny purple blossoms, just like the real thing, ready to transform any space into an enchanting garden. This project is absolutely perfect for complete beginners and wonderful for kids looking for a fun, creative activity. It also makes for a truly special handmade gift or a beautiful addition to your home decor. You’ll be amazed at how quickly these beautiful blooms come together; expect to create a lovely bunch in about 30-60 minutes. We’ll walk through each simple fold step-by-step, showing you how to create those perfect little petals and assemble them into stunning, flowing arrangements. Get ready to discover the joy of bringing nature indoors, one paper fold at a time!
DIY Hanging Paper Wisteria Flowers: A Gentle Origami Journey
Hello origami enthusiasts! Today, we’re embarking on a beautiful and surprisingly accessible project: creating delicate paper wisteria flowers. These charming blossoms, when strung together, bring a touch of ethereal elegance to any space, mimicking the cascading beauty of real wisteria vines. Don’t be intimidated by the prospect of individual flowers; we’ll break down each step with care and patience, ensuring even absolute beginners can achieve stunning results. My goal is to guide you through this process with clear instructions, so you can confidently craft your own paper wisteria garden.
Choosing Your Perfect Paper Palette
The foundation of any good origami model is the paper, and for wisteria, we have some excellent options to consider. The right paper will not only make folding easier but will also contribute significantly to the final aesthetic of your flowers.
-
Type of Paper: For our wisteria, I recommend starting with standard origami paper. This paper is specifically designed for folding, offering a good balance of strength and flexibility. It’s thin enough to allow for crisp folds and layering, but robust enough to hold its shape. If you don’t have origami paper, a thin, smooth printer paper can work in a pinch, but it might feel a bit stiffer and make achieving sharp creases a little trickier. Avoid cardstock or very thick paper, as it will be difficult to fold cleanly and the layered petals won’t lie flat.
-
Weight: Origami paper typically comes in weights around 60-80 gsm (grams per square meter). This is ideal for our wisteria. It allows for multiple folds without becoming bulky or tearing. If using printer paper, aim for something similar in weight if possible.
-
Size: For beginners, I highly suggest starting with a standard origami size, such as 15cm x 15cm (approximately 6 inches x 6 inches). This size is substantial enough to practice the folds without being fiddly, and it yields a nice-sized flower. As you gain confidence, you can experiment with smaller sizes for a more delicate look, or larger sizes for more dramatic arrangements.
-
Single or Double-Sided: This is where you can really play with your wisteria’s personality! For a classic wisteria look, double-sided paper where one side is a vibrant color (like purple, pink, or white) and the other is white is perfect. This creates a lovely contrast, with the white showing through slightly on the inner edges of the petals, giving them depth. If you prefer a more uniform look, single-sided colored paper will also work beautifully. For a truly unique touch, consider patterned origami paper – perhaps something with subtle floral motifs or a gradient effect. Just be mindful that busy patterns might distract from the delicate flower shape.
Mastering the Base Folds: The Foundation of Beauty
Before we dive into the wisteria flower itself, let’s get comfortable with a couple of fundamental folds. Practicing these will ensure your wisteria is well-formed and attractive.
-
The Valley Fold: This is the most common fold in origami. Imagine folding the paper towards you, creating a “valley” shape. To make a valley fold cleanly, align the edges or corners precisely. Run your fingernail or a bone folder firmly along the crease to make it sharp and defined. A good valley fold is the bedrock of neat origami.
-
The Mountain Fold: This is the opposite of a valley fold, where you fold the paper away from you, creating a “mountain” peak. Again, precision in alignment is key. The crease should be sharp and distinct. For our wisteria, we will primarily be using valley folds, but understanding the mountain fold is part of a complete origami vocabulary.
Your Step-by-Step Wisteria Folding Guide
Now, let’s get folding! We’ll be making a simple, yet effective wisteria petal that can then be joined together. Let’s assume you have a square piece of paper, colored side up if you’re using double-sided paper.
-
Begin with your square paper colored-side up. Fold the paper in half diagonally, bringing the bottom left corner up to meet the top right corner. Crease firmly. You will now have a triangle with the colored side facing you. Unfold this first diagonal fold.
-
Now, fold the paper in half diagonally the other way. Bring the bottom right corner up to meet the top left corner. Crease firmly. Unfold this second diagonal fold. You should now have an ‘X’ crease pattern on your paper.
-
Flip the paper over so the white side is facing you. Fold the paper in half horizontally, bringing the bottom edge up to meet the top edge. Crease firmly. Unfold this horizontal fold.
-
Fold the paper in half vertically, bringing the left edge over to meet the right edge. Crease firmly. Unfold this vertical fold. You should now have a grid of creases on your paper.
-
Now, we’re going to collapse the paper into a preliminary base. Gently push the left and right sides of the paper inwards along the horizontal crease. As you do this, the top point will naturally come down. The diagonal creases will help guide the paper. Bring the top point down to meet the bottom point, forming a smaller square. This is called a preliminary base or square base. Ensure the open edges are at the bottom.
-
With the open edges of the square base pointing towards you, take the top layer of the right flap. Fold its bottom edge in to meet the vertical center crease. Crease firmly. You’re essentially folding a flap to the center.
-
Repeat the previous step with the top layer of the left flap. Fold its bottom edge in to meet the vertical center crease. Crease firmly. You should now have a kite shape on the top layer of your square base.
-
Now, fold the small triangular tip that extends above these two flaps downwards, so its point touches the point where the two flaps meet the center crease. Crease this fold firmly. This little fold helps lock everything in place.
-
Unfold the three folds you just made (the two side flaps and the top triangular tip). You should see creases that mark where these folds were.
-
Now, we’re going to perform a petal fold. Lift the bottom point of the top layer of paper upwards. As you lift, use the creases you just made to fold the sides inwards. The paper will naturally want to open up along these creases. Flatten the paper into a diamond shape. The tip you lifted will now be pointing upwards. This is a petal fold.
-
Flip the entire model over. You will see a smooth side. Repeat steps 6 through 10 on this side. Fold the bottom edge of the right flap to the center crease, then the bottom edge of the left flap to the center crease. Fold the small triangle down to lock. Unfold these three folds. Then, perform the petal fold by lifting the bottom point upwards and folding the sides inwards along the creases, flattening into a diamond shape.
-
You should now have a diamond shape with two “legs” at the bottom. Fold the top layer of the right leg inwards so its outer edge meets the vertical center line. Crease firmly. Repeat with the top layer of the left leg, folding its outer edge to the vertical center line. Crease firmly.
-
Flip the model over and repeat step 12 on this side. Fold the top layer of the right leg inwards to the center, and the top layer of the left leg inwards to the center. You should now have a long, slender diamond shape with points at the top and bottom.
-
Now, we’re going to shape the petals. Fold the entire model in half vertically by bringing the right edge over to meet the left edge. Crease firmly. This makes the flower more compact and ready to be opened.
-
Gently open up the flower. You should see four distinct petals. To make them more rounded and wisteria-like, gently curl the tip of each petal outwards. You can do this by lightly running your fingernail along the edge of each petal from the center outwards.
-
You have now created one beautiful paper wisteria flower! To create a string of wisteria, you can make many of these flowers. Then, using a needle and thread, string them together by carefully passing the thread through the points at the top of each flower, or through a small hole you might make at the top of the flower.
Navigating Common Pitfalls: Avoiding Beginner Blunders
As you practice, you might encounter a few tricky spots. Don’t get discouraged! These are common areas where beginners often go wrong, and with a little awareness, you can easily overcome them.
-
Fussy Creases: If your folds aren’t sharp and precise, the final flower will look a bit floppy and less defined.
How to Avoid: After each fold, take a moment to really press down along the crease. Use the side of your fingernail or a specialized origami tool called a bone folder if you have one. Ensure edges and corners align perfectly *before* you make the crease. Don’t rush the creasing process. -
Misaligned Layers During Petal Folds: The petal fold (step 10 and 11) is where things can get a bit wobbly if the paper doesn’t align perfectly with the pre-made creases.
How to Avoid: Before you start the petal fold, ensure the creases from steps 6, 7, and 8 are clearly visible. When lifting the bottom point, focus on guiding the sides *inward* along those creases. It might feel like you’re pushing the paper against its natural inclination, but trust the creases. Flatten it down slowly and deliberately. -
Over-Folding or Tearing: Sometimes, when trying to force a fold or if the paper isn’t quite right, you might find yourself struggling, or even tearing the paper.
How to Avoid: Remember that origami paper is delicate. If a fold feels like it’s resisting too much, check if you’ve aligned everything correctly. Sometimes, a slight adjustment in how you’re holding the paper or a gentle coaxing rather than a forceful push is all it needs. If you’re using printer paper, be extra gentle. Don’t try to make folds that aren’t dictated by the previous steps; the paper is designed to fold in specific ways.
Variations to Spark Your Creativity
Once you’ve mastered the basic wisteria flower, the possibilities for customization are immense! Don’t be afraid to experiment.
-
Size Matters: As mentioned, using smaller squares of paper will create smaller, more delicate wisteria blooms, perfect for intricate garlands or small embellishments. Larger squares will give you larger, more prominent flowers. Try a few different sizes to see what you like best.
-
Paper Patterns: Get adventurous with patterned paper! Papers with subtle gradients, subtle floral designs, or even a watercolor effect can add incredible depth and beauty to your wisteria. Just be mindful that very busy patterns might detract from the flower’s shape. Consider double-sided patterned paper for even more visual interest.
-
Color Play: While traditional wisteria is often purple or pink, don’t limit yourself! Think about other color combinations. Imagine delicate white wisteria for a wedding, vibrant blues and greens for a summer theme, or even a mix of colors within a single strand for a whimsical effect. You can also ombre effect by using paper that fades from one color to another.
Displaying and Gifting Your Wisteria Wonders
Your handmade paper wisteria isn’t just a crafting achievement; it’s a beautiful decorative element and a thoughtful gift. Here are some ideas:
-
Hanging Garlands: The most popular way to display paper wisteria is by stringing them together to create cascading garlands. Hang them from ceilings, doorways, windows, or along mantels for a truly enchanting display. For larger projects, you can use thicker twine or even thin branches as a base to attach your wisteria strands.
-
Event Decorations: Paper wisteria is perfect for parties, weddings, baby showers, or any special occasion. They add a touch of handmade charm that guests will adore. Imagine them adorning a wedding arch, a dessert table, or as a beautiful backdrop for photos.
-
Home Decor Accents: A single strand of wisteria can brighten up a corner of your room, a bookshelf, or a nursery. You can also attach them to lampshades, curtains, or even create a mobile for a child’s room.
-
Thoughtful Gifts: A string of handmade wisteria makes a wonderfully personal and heartfelt gift. Package them nicely in a decorative box or tie them with a beautiful ribbon. They are perfect for birthdays, holidays, or just to let someone know you’re thinking of them.
-
Craft Projects: Incorporate individual wisteria flowers into other craft projects. Glue them onto handmade cards, scrapbook pages, or use them to embellish gift tags. They can add a delicate, three-dimensional element that really makes your creations stand out.
I hope you’ve enjoyed this journey into creating paper wisteria. Remember, practice makes perfect, and the joy is in the process. Happy folding, and may your homes be filled with the delicate beauty of your own paper wisteria creations!
Conclusion
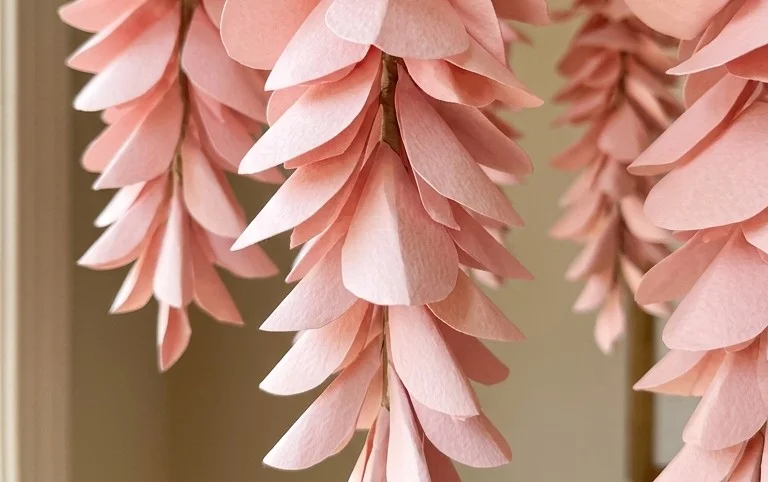
You’ve just learned how to create beautiful hanging paper wisteria flowers! Don’t worry if your first attempt isn’t perfect – every crafter’s first paper wisteria is a practice piece. The joy is in the process of folding and seeing your creation come to life. We’d absolutely love to see your finished paper wisteria arrangements! Share a photo and tag us so we can admire your work. Once you’ve mastered this technique, why not try a variation using different colored papers for a multi-hued cascade, or perhaps try making smaller buds to add more depth? There are so many wonderful paper projects waiting for you to explore. Happy folding!